
こんにちは、あっきー(IwswAkht)です。
最近またPHPをさわる機会がふえてきたのでとりあえず作業用のMacにLaravelを動かせる環境構築しておこうと作業しました。
PHPは自己学習でやってたので、あまりバージョンとか考えないで遊びながら使ってたのでいざ仕事で使うとなったときにバージョン管理について考える機会に恵まれましたので今回は忘備録として記事をのこうと思います。
以下、PHPのバージョンに関する情報が載ってます。

本日はphpbrewで最新の7.4系に変更する方法を書いていこうと思います。
作業手順
まず最初に作業の手順を確認して大まかなアウトラインを掴んでおきましょう!
- homebrewのインストール
- phpbrewのインストールや初期設定
- phpbrewからPHP最新verをインストール
- 最新のPHPに切り替える
順番に確認していきましょう。
homebrewのインストール
Macで環境構築する場合、homebrewというツールを使います。
homebrewはいわゆるパッケージマネージャーなのでhomebrewのコマンドを介してインストールやパッケージの管理が一元化できるので便利ですよ。
ですのでまずhomebrewがインストールされているのか確認してみましょう。以下のコマンドを実行してください。
ターミナル
|
1 |
$ brew doctor |
実行結果にzsh: command not found: brewと表示されましたら、そのまま読み続けてください。
Your system is ready to brew.と表示されましたら、すでにhomebrewがインストールされている状態ですのでこの項目はスキップして構いません。
では、homebrewがなかった場合の説明をします。homebrewを使うためにはXcodeが必要ですのでApp Storeからインストールしましょう。
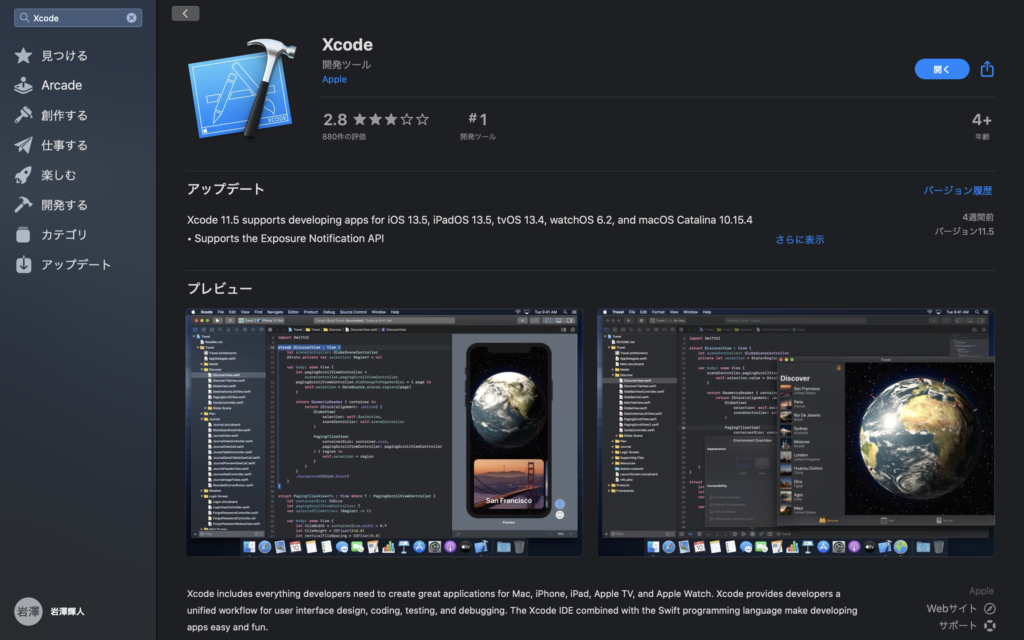
Xcodeのインストールが完了しましたら、ターミナルで以下のコマンドを実行してください。
ターミナル
|
1 |
$ /bin/bash -c "$(curl -fsSL https://raw.githubusercontent.com/Homebrew/install/master/install.sh)" |
このコマンドはhomebrewの公式サイトから取得してます。
実行しましたらパスワード入力を求められますので入力してください。
次にXcode Command Line Toolsのインストールが必要になりますのでその確認をされます。
プロセスログに以下のような表示が確認でます。
ログ
|
1 2 3 4 |
# 一部抜粋 ==> The Xcode Command Line Tools will be installed. Press RETURN to continue or any other key to abort |
確認できましたらEnterを押して処理を続行してください。以下のようなログが表示されれば大丈夫です。
ログ
|
1 2 3 4 5 6 7 8 9 10 11 12 13 14 15 |
# 一部抜粋 ==> Installation successful! ==> Homebrew has enabled anonymous aggregate formulae and cask analytics. Read the analytics documentation (and how to opt-out) here: https://docs.brew.sh/Analytics No analytics data has been sent yet (or will be during this `install` run). ==> Homebrew is run entirely by unpaid volunteers. Please consider donating: https://github.com/Homebrew/brew#donations ==> Next steps: - Run `brew help` to get started - Further documentation: https://docs.brew.sh |
phpbrewのインストールや初期設定
Macのシステム内のデフォルトのPHPのバージョンが低い場合(7.2以下)はphpbrewがうまくセットアップできないようなのでhomebrewを使用してあらかじめ、バージョン7.2以降のPHPをインストールしておきます。
ターミナル
|
1 2 3 4 5 6 7 8 9 |
# インストール出来るPHPの確認 $ brew search php@7 # 実行結果 ==> Formulae php@7.2 php@7.3 php@7.4 # 最新版7.4系をインストール $ brew install php@7.4 |
最新版のPHPを取得しましたらphpbrewのセットアップを行っていきます。
以下にドキュメントのリンクも貼っておきますが、クイックリファレンスとして必要なコマンドを抜粋しましたので参考にしてください。
ターミナル
|
1 2 3 4 5 6 7 8 9 10 11 12 13 14 15 16 |
# phpbrewインストール $ curl -L -O https://github.com/phpbrew/phpbrew/releases/latest/download/phpbrew.phar # phpbrew実行権限+ファイル移動 # =phpbrewコマンドを使えるようにする $ chmod +x phpbrew.phar $ sudo mv phpbrew.phar /usr/local/bin/phpbrew # phpbrew初期化 $ phpbrew init # 環境変数設定 $ echo 'source ~/.phpbrew/bashrc' >> ~/.bashrc # プレフィックスのセットアップ $ phpbrew lookup-prefix homebrew |
Did you mean 'self-update'? [Y/n]と聞かれますのでYを入力してくEnterを押してください。
完了しましたら以下のようなログが出力されます。
ログ
|
1 2 3 4 5 6 7 8 9 10 11 12 13 14 15 16 17 18 19 20 21 22 23 24 25 26 27 |
Did you mean 'self-update'? [Y/n] Y Updating phpbrew /usr/local/bin/phpbrew... downloading via curl command % Total % Received % Xferd Average Speed Time Time Time Current Dload Upload Total Spent Left Speed 100 138 100 138 0 0 1604 0 --:--:-- --:--:-- --:--:-- 1604 100 621 100 621 0 0 6148 0 --:--:-- --:--:-- --:--:-- 6148 100 627k 100 627k 0 0 366k 0 0:00:01 0:00:01 --:--:-- 898k Version updated. Using root: /Users/iwasawaakihito/.phpbrew Initialization successfully finished! <=====================================================> Phpbrew environment is initialized, required directories are created under /Users/iwasawaakihito/.phpbrew Paste the following line(s) to the end of your ~/.bashrc and start a new shell, phpbrew should be up and fully functional from there: source /Users/iwasawaakihito/.phpbrew/bashrc To enable PHP version info in your shell prompt, please set PHPBREW_SET_PROMPT=1 in your `~/.bashrc` before you source `~/.phpbrew/bashrc` export PHPBREW_SET_PROMPT=1 To enable .phpbrewrc file searching, please export the following variable: export PHPBREW_RC_ENABLE=1 For further instructions, simply run `phpbrew` to see the help message. Enjoy phpbrew at $HOME!! |
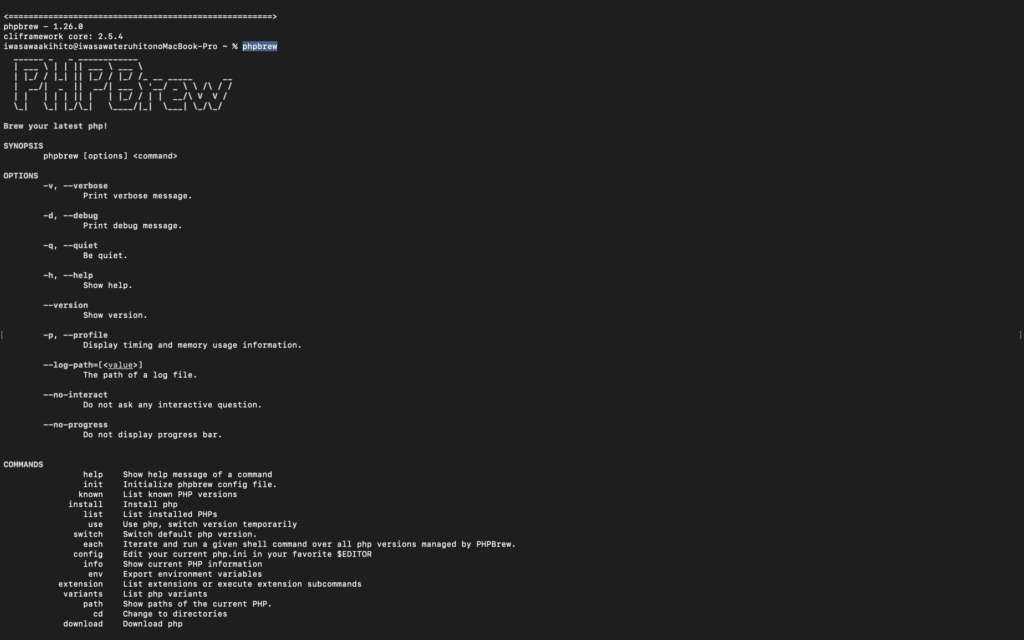
問題なく進みましたら最後に以下のコマンドを実行してください。
ターミナル
|
1 |
$ phpbrew |
画像のような出力が確認できます。
phpbrewからPHP最新verをインストール
phpbrewコマンドが使えるようになりましたので最新版のPHPをインストールしていきます。
以下のコマンドを実行してインストールできるバージョンの一覧を出力します。
ターミナル
|
1 |
$ phpbrew known |
実行結果は以下です。
ログ
|
1 2 3 4 5 6 7 8 9 10 11 12 13 14 15 |
===> Fetching release list... Downloading https://secure.php.net/releases/index.php?json&version=7&max=100 via curl extension [==================================================================] 178.00/178.00B 100% Redirecting to https://www.php.net/releases/index.php?json&version=7&max=100 Downloading https://secure.php.net/releases/index.php?json&version=5&max=100 via curl extension [==================================================================] 178.00/178.00B 100% Redirecting to https://www.php.net/releases/index.php?json&version=5&max=100 7.4: 7.4.7, 7.4.6, 7.4.5, 7.4.4, 7.4.3, 7.4.2, 7.4.1, 7.4.0 ... 7.3: 7.3.19, 7.3.18, 7.3.17, 7.3.16, 7.3.15, 7.3.14, 7.3.13, 7.3.12 ... 7.2: 7.2.31, 7.2.30, 7.2.29, 7.2.28, 7.2.27, 7.2.26, 7.2.25, 7.2.24 ... 7.1: 7.1.33, 7.1.32, 7.1.31, 7.1.30, 7.1.29, 7.1.28, 7.1.27, 7.1.26 ... 7.0: 7.0.33, 7.0.32, 7.0.31, 7.0.30, 7.0.29, 7.0.28, 7.0.27, 7.0.26 ... 5.6: 5.6.40, 5.6.39, 5.6.38, 5.6.37, 5.6.36, 5.6.35, 5.6.34, 5.6.33 ... 5.5: 5.5.38, 5.5.37, 5.5.36, 5.5.35, 5.5.34, 5.5.33, 5.5.32, 5.5.31 ... 5.4: 5.4.45, 5.4.44, 5.4.43, 5.4.42, 5.4.41, 5.4.40, 5.4.39, 5.4.38 ... |
現在の最新版は7.4.7をインストールしましょう。
ターミナル
|
1 |
$ phpbrew install 7.4.7 +default |
成功した場合以下のログがでます。
ログ
|
1 2 3 4 5 6 7 8 9 10 11 12 13 14 15 16 17 18 19 20 21 22 23 24 25 26 27 28 29 30 31 32 33 34 35 36 37 38 39 40 41 42 43 44 45 46 47 |
===> phpbrew will now build 7.4.7 ===> Loading and resolving variants... Checking distribution checksum... Checksum matched: 800e0d01f359c8ec41540925c0d4a24c34d5f21ef6addd6d82ff4a52be23d87a ===> Distribution file was successfully extracted, skipping... ===> Checking patches... Checking patch for replace apache php module name with custom version name Checking patch for replace freetype-config with pkg-config on php older than 7.4 Found existing build.log, renaming it to /Users/iwasawaakihito/.phpbrew/build/php-7.4.7/build.log.1592467415 ===> Configuring 7.4.7... Use tail command to see what's going on: $ tail -F '/Users/iwasawaakihito/.phpbrew/build/php-7.4.7/build.log' ===> Checking patches... Checking patch for php5.3.29 multi-sapi Checking patch for php5.3.x on 64bit machine when intl is enabled. Checking patch for openssl dso linking patch 2 changes patched. Checking patch for php5.6 with openssl 1.1.x patch. ===> Building... Build finished: 7.2 minutes. Installing... ---> Creating php-fpm.conf ---> Creating php.ini ---> Copying /Users/iwasawaakihito/.phpbrew/build/php-7.4.7/php.ini-development ---> Found date.timezone is not set, patching... Initializing pear config... config-set succeeded config-set succeeded config-set succeeded Enabling pear auto-discover... config-set succeeded Congratulations! Now you have PHP with 7.4.7 as php-7.4.7 * To configure your installed PHP further, you can edit the config file at /Users/iwasawaakihito/.phpbrew/php/php-7.4.7/etc/php.ini To use the newly built PHP, try the line(s) below: $ phpbrew use php-7.4.7 Or you can use switch command to switch your default php to php-7.4.7: $ phpbrew switch php-7.4.7 Enjoy! |
phpbrewのインストールでエラーが出た時
phpbrew install 7.4.7 +defaultを実行してインストールに失敗した場合のトラブルシューティングです。
インストールに失敗した場合の原因は主に2つです。
- パッケージが足りていない
- パッケージはあるがパスが通ってない
順に書いていきます。
パッケージが足りてない
例えば以下のようなログが出力されてたとします。
ログ
|
1 2 3 4 5 6 7 8 9 10 11 12 13 |
Error: Configure failed: The last 5 lines in the log file: and LIBXML_LIBS to avoid the need to call pkg-config. See the pkg-config man page for more details. To get pkg-config, see <http://pkg-config.freedesktop.org/>. See `config.log' for more details Please checkout the build log file for more details: tail /Users/iwasawaakihito/.phpbrew/build/php-7.4.7/build.log |
この場合はpkg-config.というパッケージが足りていないということですね。
これでもわかりますがbuild.logの最終5行確認してみてとも怒られていますのでもう少し細かくみてみましょう。
以下のコマンドで確認してみましょう。
ターミナル
|
1 |
$ less ./.phpbrew/build/php-7.4.7/build.log |
以下のような記述があるかと思います。
/Users/user-name/.phpbrew/build/php-7.4.7/build.log
|
1 2 3 4 5 6 7 8 9 10 11 |
configure: error: in `/Users/iwasawaakihito/.phpbrew/build/php-7.4.7': configure: error: The pkg-config script could not be found or is too old. Make sure it is in your PATH or set the PKG_CONFIG environment variable to the full path to pkg-config. Alternatively, you may set the environment variables LIBXML_CFLAGS and LIBXML_LIBS to avoid the need to call pkg-config. See the pkg-config man page for more details. To get pkg-config, see <http://pkg-config.freedesktop.org/>. See `config.log' for more details |
パッケージないからWebからpkg-configのファイルを取得してとのことです。
ですがこれhomebrewからでも取得できます。
以下のコマンドを実行してください。
ターミナル
|
1 |
$ brew install pkg-config |
その他には以下のようなエラーも出たりします。
ログ
|
1 2 3 4 5 6 7 8 9 10 11 12 13 14 |
Error: Configure failed: The last 5 lines in the log file: checking for ZLIB support... no checking whether to enable bc style precision math functions... yes checking for BZip2 support... yes checking for BZip2 in default path... not found configure: error: Please reinstall the BZip2 distribution Please checkout the build log file for more details: tail /Users/iwasawaakihito/.phpbrew/build/php-7.4.7/build.log |
似たようなエラーですね。
この場合はもう関連パッケージをまとめてインストールしてしまいましょう。
以下のコマンドを実行してください。
ターミナル
|
1 |
$ brew install libxml2 bzip2 mhash curl |
どんなパッケージのエラーが出るかはPCによって変わるところはあると思いますのでbrew listコマンドで以下のリストとパッケージの有無の確認をして対応していけば解決できると思います。
ターミナル
|
1 2 3 4 5 6 7 8 9 10 11 12 13 14 15 16 17 18 |
$ brew install openssl@1.1 $ brew install bzip2 $ brew install intltool $ brew install mhash $ brew install pkg-config $ brew install xz $ brew install curl $ brew install libxml2 $ brew install oniguruma $ brew install python@3.8 $ brew install zlib $ brew install gdbm $ brew install libzip $ brew install readline $ brew install icu4c $ brew install mcrypt $ brew install pcre $ brew install sqlite |
※場合によっては不必要なパッケージもあるかと思いますので基本はエラーにそってインストールする方がいいです。
パッケージはあるがパスが通ってない
パッケージはあるけどダメなケースもあります。
例えば以下のようなエラーが出力されたとします。
ログ
|
1 2 3 4 5 6 7 8 9 10 11 |
Error: Configure failed: The last 5 lines in the log file: checking whether to enable zend-test extension... no checking for zip archive read/writesupport... yes checking pcre install prefix... /usr/local checking libzip... yes checking for the location of zlib... configure: error: zip support requires ZLIB. Use --with-zlib-dir=<DIR> to specify prefix where ZLIB include and library are located |
この場合はzlibというパッケージの場所を認識していないので、"--with-zlib-dir="でパス指定をする必要があります。
以下のコマンドを実行してください。
ターミナル
|
1 |
$ phpbrew install 7.3.14 -- --with-zlib-dir="${brew --prefix zlib}" |
最新のPHPに切り替える
phpbrewからPHPのインストールが完了しましたので切り替えましょう。
以下のコマンドを実行してください。
ターミナル
|
1 |
$ phpbrew list |
これで以下のログのようにインストールされたPHPのバージョン一覧が表示されます。
ログ
|
1 2 |
* (system) php-7.4.7 |
* (system)はデフォルトで入ってるPHPのバージョンを指すんじゃ
表示された一覧から使いたいバージョンを選択して適応させます。以下のコマンドを実行してください。
ターミナル
|
1 |
$ phpbrew use php-7.4.7 |
最後に設定が適応されたか確認しましょう。
ターミナル
|
1 2 3 4 5 6 7 |
# バージョン確認 $ php -v # 参照もとの確認 $ which php # /Users/user-name/.phpbrew/php/php-7.4.7/bin/phpと出力されれば大丈夫です。 |
お疲れ様です。これで完了です。
バージョン適応時のエラー:Invalid argument php-7.4.7
phpbrew use php-7.4.7でタイトルのエラーが出た場合は以下のコマンドを実行してください。
ターミナル
|
1 |
$ source ~/.phpbrew/bashrc |
【コラム】.bashrcなどの設定ファイルについて
「phpbrewのインストールや初期設定」のecho 'source ~/.phpbrew/bashrc' >> ~/.bashrcコマンドや「バージョン適応時のエラー:Invalid argument php-7.4.7」のsource ~/.phpbrew/bashrcコマンドなどで出てくるbashrcというキーワードについてです。
これは設定ファイルとしていろいろ環境を設定する場所なのですが、他の記事を参考にしていますと.bash_profileや.zshrcに書くなどいろいろ意見がありました。
なので僕なりの解釈でそんな時はどう対応するかまとめました。
まずは以下の4点をなんとなくでいいので理解しておきましょう。
- シェルの種類は何か
- ログインシェル
- 対話型シェル
- 非対話型シェル
・シェルの種類とは?
Macでシェルを起動したときに画面の上部になんと表示されていますか?
絶対ではないですが、ここがbashの場合.bash_profileを使う、zshの場合はzshrcを設定ファイルに使うというケースが多いのかなと思います。
ちなみにMacの場合はCatalina以降ではデフォルトのシェルがzshに変わり、その前はbashがデフォルトです。
詳しい人に言ったら怒られるかもしれないですが、もっと極端なこと言ってしまうとls -aコマンドを実行したときにデフォルトで存在した設定ファイルにとりあえず書いておけばある程度は問題ないのではと(笑)
ですが、それだとダメなケースがあります。
なぜかというとログインシェルか対話型シェルかどっちかなど、ファイルの配置の仕方によってはファイルの検索順序の優先度が変わってくるからです。
一例としては、~/.profileを使っていたけど、~/.bash_profileを作成したら設定が読み込まれなくなったなど。このような時はファイルの検索順序が影響したためです。
そういう理由もあるということと、一緒にシェルにも対話型などいろいろ種類があるということは今回は理解しておいてください。
最後にbashとzshの場合でのシェルの起動時に読み込む初期化ファイルの変化について簡単なフローで書き起こしましたので参考にしてみてください。
・bashの場合
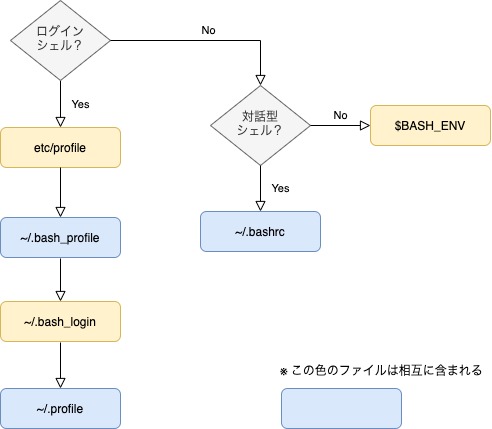
bashの場合ドット(.)付きファイルに関しては一つ見つけたら以降の探索は行いません。むやみにいろいろ設定ファイルを作成すると読み込み順によっては適応されない場合などが発生するわけです。
・zshの場合
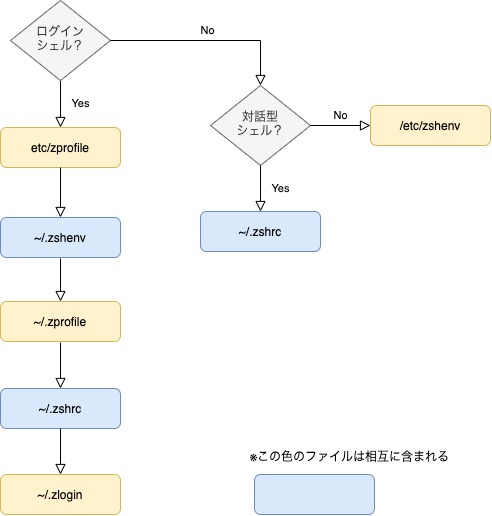
zshの場合だと例えば.zshrcと.zlogin両方あれば両方のファイルを実行します。
Laravelの環境もつくりましょう
せっかくなので最後にLaravel環境も作って終わりにしましょう。おまけなので簡単にいきます。
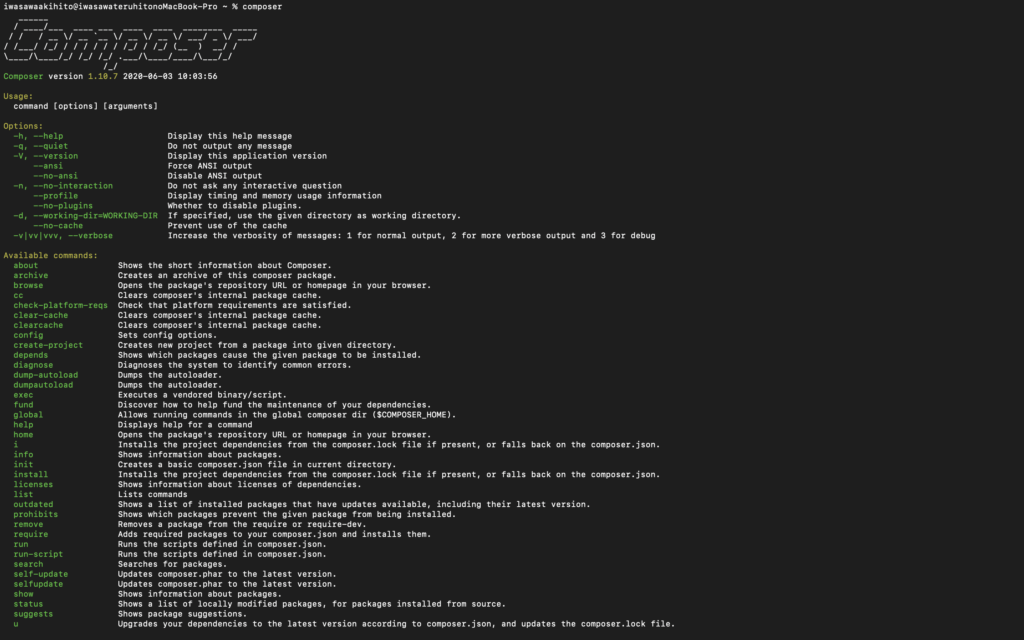
まずはcomposerをインストールします。以下のコマンドを実行してください。
ターミナル
ターミナル
|
1 2 3 |
# composerのインストール $ curl -sS https://getcomposer.org/installer | php $ <span class="s1">mv composer.phar /usr/local/bin/composer</span> |
以下の画像のが出れば問題ないです。
次にLaravelのインストールを行います。
ターミナル
|
1 |
$ composer global require "laravel/installer" |
次にcomposerを環境変数に設定します。
以下のコマンドを実行してください。
ターミナル
|
1 |
$ vi bashrc |
vimが起動しますので i で編集モードに入りかえ、以下の編集を加えてください。
.bashrc
|
1 |
export PATH=$HOME/.composer/vendor/bin:$PATH |
記入が終わりましたら、 esc を押して編集モードを終了し :wq でファイルを上書き保存してください。
vimのコマンドについては以下の記事でも取り扱っていますのでご参考にしてください。

次に設定を反映させます。以下のコマンドを実行してください。
ターミナル
|
1 |
$ source ~/.bashrc |
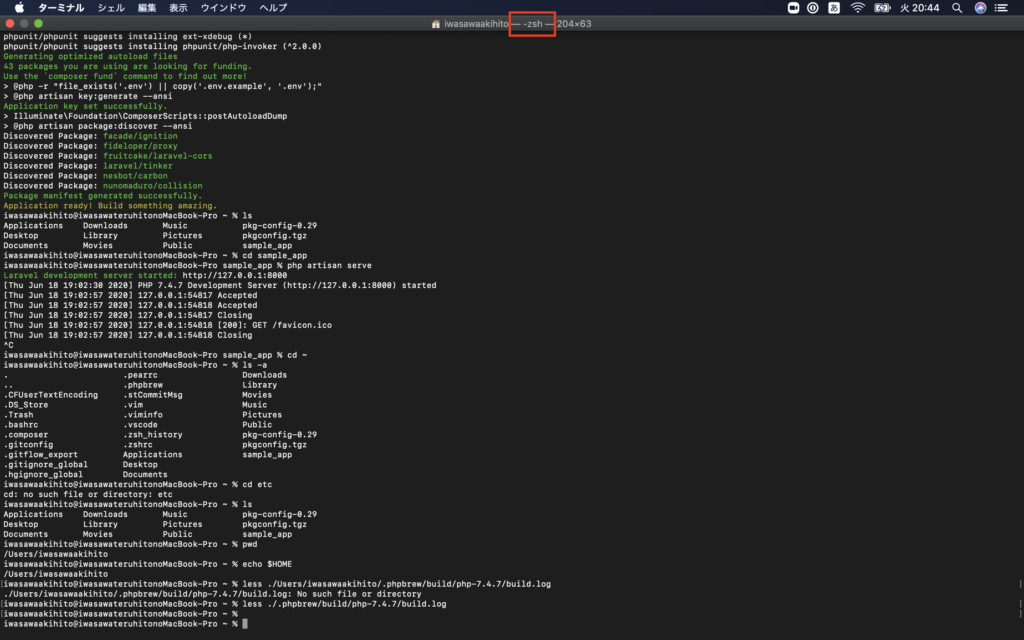
最後にLaravelのプロジェクトを作成して初期画面を表示させます。以下のコマンドを順番に実行しましたらhttp://127.0.0.1:8000/にアクセスしてください。
ターミナル
|
1 2 3 4 5 6 7 8 |
# Laravelプロジェクトの作成 $ laravel new sample_app # プロジェクトフォルダに移動 $cd sample_app # サーバー起動 $ php artisan serve |
以下の初期画面が表示されたら完了です!

Laravelの環境構築に関しては以下の記事も参考にしてください。
AWSでしたら参考リンクでローカル環境なら本記事の方法でやってもらえたらスムーズかと思います。

さいごに
最後まで読んでいただきありがとうございます。
PHPの環境構築久しぶりにやったので違う方法でハンズオンのような形で残したく記事にしましたがいかがだったでしょうか?
何か不備やご意見ございましたらお気軽に教えていただけますと幸いです。
この記事を気に入っていただけましたらTwitterでもプログラミングやブログに関してのツイートをリアルタイムでしていますので
ご一緒にフォローもお願いします。